Creating an MCP
5 min read
This guide walks you through publishing an MCP server to the MCP Hub catalog using the web dashboard. Once published and certified, your server becomes available for anyone to discover and run with smcp run.
Prerequisites
Before you begin, make sure you have:
- An account on mcp-hub.info – Sign up at mcp-hub.info if you have not already.
- A Git repository containing your MCP server source code. Supported languages are Python, TypeScript, JavaScript, and Go.
- The repository must be accessible from the internet (public, or hosted on a provider that supports token-based cloning such as GitHub, GitLab, or Bitbucket).
Step 1: Log In
Navigate to mcp-hub.info and click Sign In in the top-right corner. You can authenticate with:
- GitHub – Recommended. Links your GitHub identity for origin verification.
- Email and password – Standard account creation with email confirmation.
If you sign in with GitHub, your verified identity allows your published packages to display the Verified origin badge instead of Community.
Step 2: Navigate to Create MCP
Once logged in, go to your Dashboard. You will see a navigation sidebar on the left. Click My MCPs, then click the Create MCP button in the top-right corner of the page.
Step 3: Enter Your Repository URL
The first section of the creation form asks for the source of your MCP server.

Enter the full Git repository URL. Supported formats include:
| Provider | URL format |
|---|---|
| GitHub | https://github.com/your-org/your-repo |
| GitLab | https://gitlab.com/your-org/your-repo |
| Bitbucket | https://bitbucket.org/your-org/your-repo |
| Any Git host | Any HTTPS URL that supports git clone |
The platform will clone the repository and automatically detect the language, entry point, and dependencies.
Step 4: Configure Metadata
After entering the repository URL, fill in the metadata fields:
| Field | Required | Description |
|---|---|---|
| Name | Yes | The package name. This will be combined with your organization to form the full reference (e.g. your-org/your-name). Use lowercase letters, numbers, and hyphens only. |
| Description | Yes | A short summary of what your MCP server does. This appears on the catalog card and in search results. Keep it under 200 characters. |
| Category | Yes | The primary category for your server: AI, Data, DevTools, Security, or Other. This determines which catalog filter section your package appears in. |
| Tags | No | Comma-separated keywords to improve discoverability. For example: postgres, database, sql, connector. Tags are searchable in the catalog. |
Choose your name carefully. Package names are unique within your organization and cannot be changed after creation.
Step 5: Submit for Analysis
Click the Create button to submit your MCP server. The platform immediately begins the automated analysis pipeline.
What Happens During Analysis
After submission, the platform performs the following steps automatically:
- Clone – The repository is cloned from the URL you provided.
- Detection – The platform identifies the programming language, runtime requirements, entry point, and dependency manifest.
- Security scan – The mcp-scan engine runs 46+ security detectors across 14 vulnerability classes, including:
- Prompt injection vectors
- Data exfiltration paths
- Privilege escalation patterns
- Supply chain attack indicators
- Credential exposure
- Unsafe deserialization
- Resource abuse patterns
- Scoring – A deterministic security score from 0 to 100 is computed based on the findings.
- Certification – The score maps to a certification level:
| Cert Level | Name | Required Score |
|---|---|---|
| 0 | Integrity Verified | Any |
| 1 | Static Verified | >= 60 |
| 2 | Security Certified | >= 80 |
| 3 | Runtime Certified | >= 90 |
- Artifact creation – A certified bundle is built, signed with a content-addressed SHA-256 digest, and published to the registry.
Analysis typically takes 1 to 5 minutes depending on the size of the repository and the number of dependencies.
Step 6: View Results
Navigate to Dashboard > My MCPs to check the status of your submission.
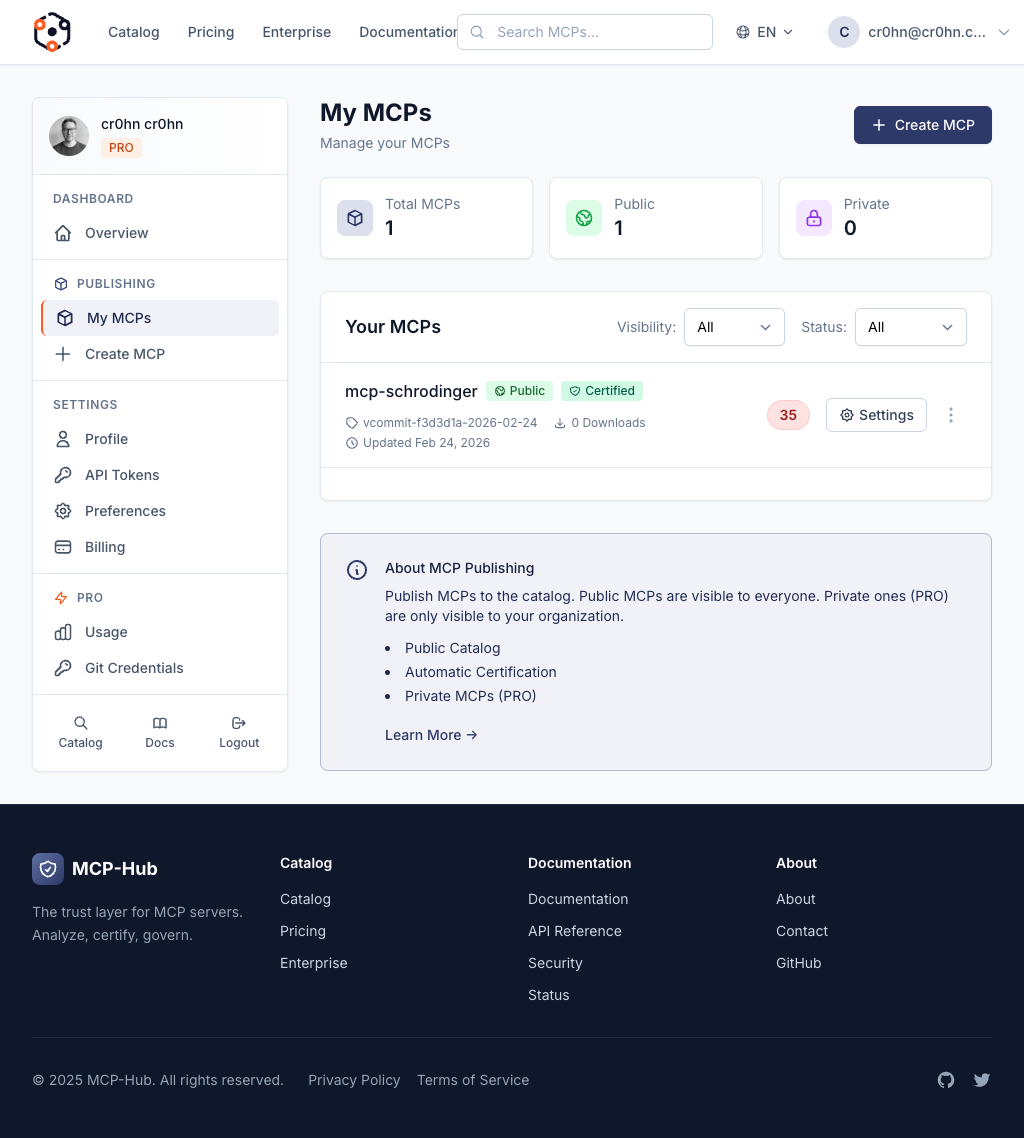
Each MCP entry displays its current status:
| Status | Meaning |
|---|---|
| Analyzing | The security analysis is in progress. Wait for it to complete. |
| Certified | Analysis passed. Your MCP server is now live in the public catalog and available for installation. |
| Failed | Analysis found critical issues that prevent certification. See the detail page for specific findings. |
If Your MCP is Certified
Your package is now listed in the public catalog at mcp-hub.info/catalog. Anyone can install and run it with:
smcp run your-org/your-name@latest
The catalog card will display your name, description, origin badge, score, and version.
If Your MCP Failed
Click on the failed entry to see the detailed analysis report. The report lists each finding with:
- Vulnerability class (e.g. A: Prompt Injection, F: Data Exfiltration).
- Severity (Critical, High, Medium, Low, Info).
- Location in your source code (file, line number).
- Description of the issue and why it was flagged.
- Remediation guidance on how to fix it.
Fix the reported issues in your repository, then return to the dashboard and click Re-analyze to trigger a new scan.
Tips for a High Score
Follow these practices to maximize your security score and certification level:
- Keep your repository clean. Remove unused files, build artifacts, and temporary data before submitting. Extraneous files can trigger false positives or increase analysis time.
- Use standard entry points. Follow the conventions for your language:
main.pyorserver.pyfor Python,index.tsorindex.jsfor TypeScript/JavaScript,main.gofor Go. The platform auto-detects standard entry points more reliably. - Declare dependencies properly. Use
requirements.txtorpyproject.tomlfor Python,package.jsonfor Node.js, andgo.modfor Go. Undeclared dependencies are flagged as supply chain risks. - Avoid hardcoded credentials. Never embed API keys, passwords, or tokens in your source code. Use environment variables instead. The scanner specifically detects credential patterns.
- Minimize permissions. Only request the permissions your server actually needs. Requesting broad filesystem or network access without justification lowers your score.
- Handle errors safely. Do not expose stack traces, internal paths, or sensitive configuration in error messages. The scanner checks for information disclosure patterns.
- Pin your dependencies. Use exact versions rather than ranges. Unpinned dependencies are flagged as potential supply chain vectors.
Updating Your MCP
To publish a new version:
- Push your changes to the Git repository.
- Go to Dashboard > My MCPs and click on your MCP.
- Click New Version to trigger a fresh analysis of the current repository state.
Each version goes through the full analysis pipeline independently. Previous versions remain available in the registry; users who pin to a specific version will continue to receive that exact version.
Next Steps
- Browsing the Catalog – See how your published MCP appears to users.
- Running MCP Servers – Test your published MCP by running it from the registry.